NOTE

This blog page has moved! I will now be posting updates in https://thingssocool.blogspot.com/

Tuesday, January 22, 2019

Home Filament Factory

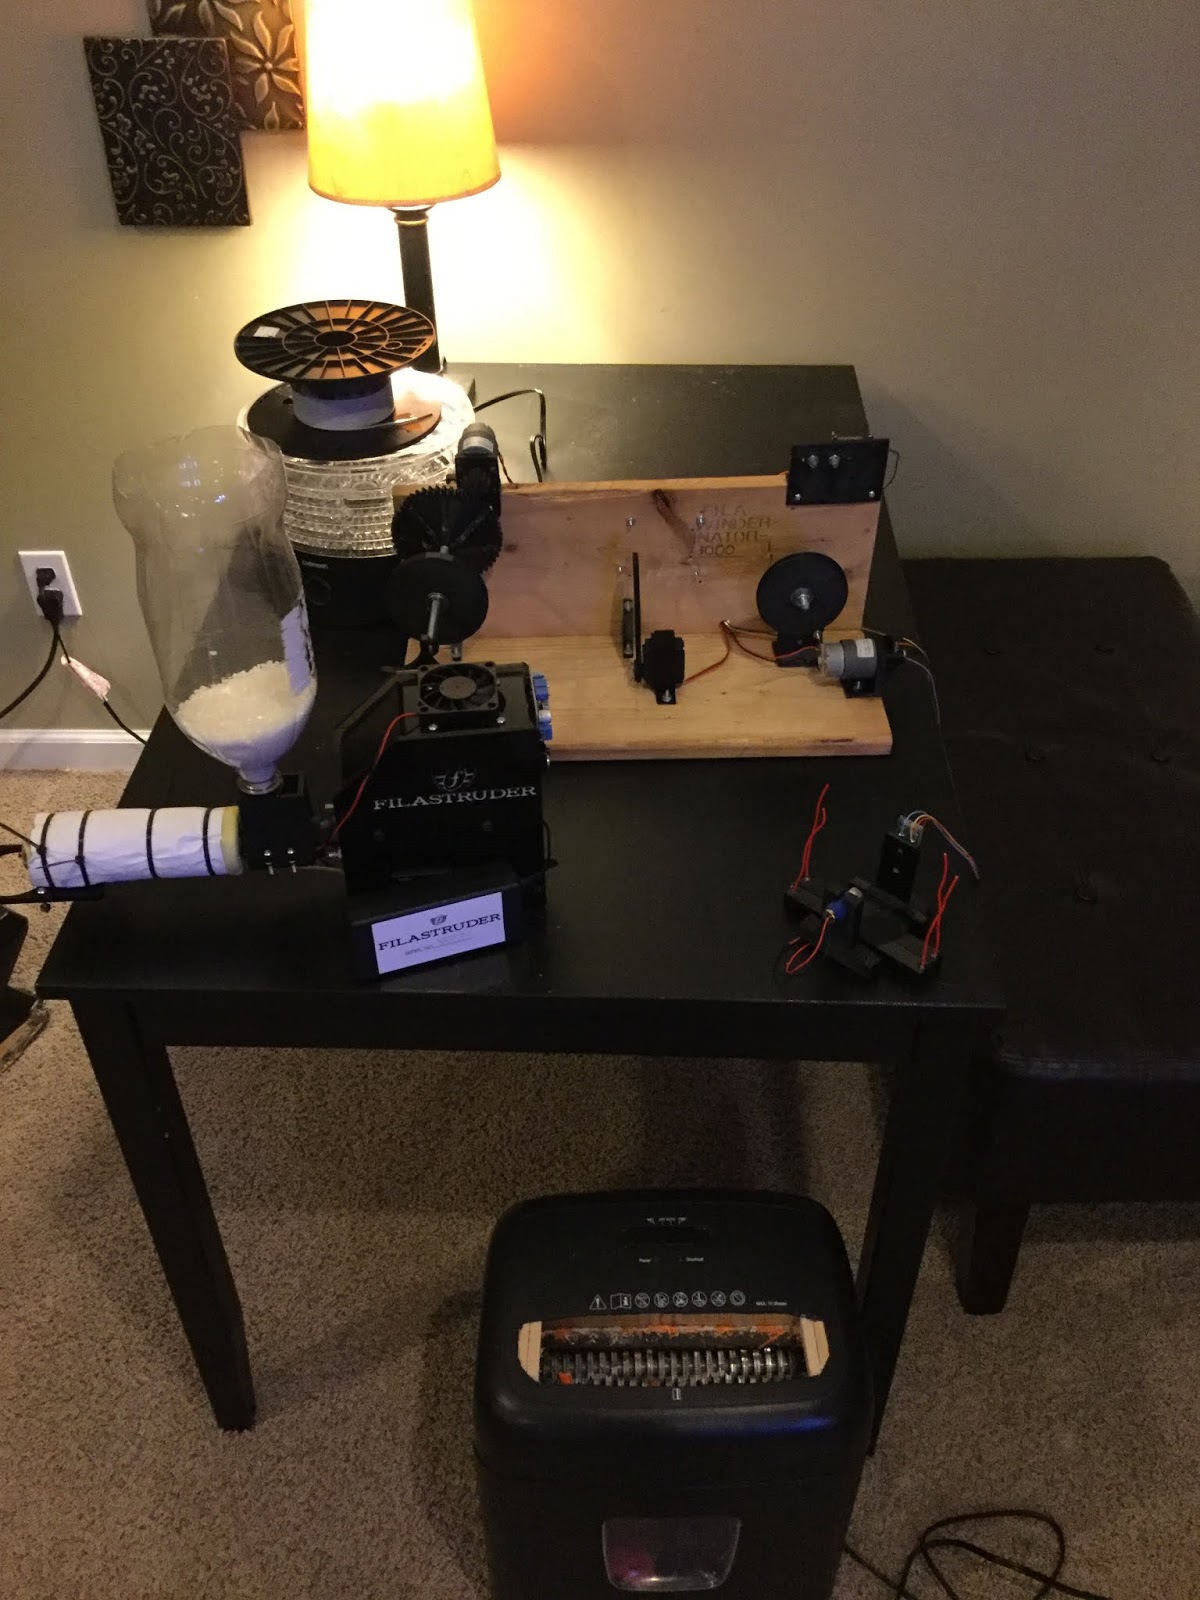
Over the past several months, I have been slowly assembling the required components for a complete home filament recycling/extruding factory. This setup includes the following: a filament extruder, a filament winder, a plastics shredder, and a plastics dehydrator. 

For the filament extruder, I acquired and assembled a filastruder branded machine kit. The only unique modification to this was the hole I drilled into the bottom of the hotend. This allows the filament to be extruded directly downward for easier usage in conjunction with the winder. I later removed this modification because there were some inconsistencies with extrusion width and I had realized that can still be used effectively with the winder in the horizontal position.

 
The winder was homemade from scratch by me and is loosely based on the original filament winder by Ian Johnson. It features many of the same parts and abilities of the latter, but several improvements have been implemented to make it more effective for me personally. 


The dehydrator is a relatively cheap round food dehydrator that was found online. It is the perfect size for filament rolls and is also used for pellets. All I did was simply remove the center of each “shelf” to produce the hollow rings. These can then be added or subtracted depending on the size of the load.

My favorite (and definitely most fun) machine in this assemblage is the plastic shredder. I originally purchased a 10 sheet cross-cut paper shredder from a local Big-box store. I then proceeded to remove all the annoying safeties and locks. The result is a machine that is terrifyingly ravenous. It can easily shred most of my wasted or discarded print material (just as long as it isn’t 100% infill) and turn it into crumbs.


Initial shreddings are quite too large to run through the extruder, but after several times through the shredder, it starts to look like the images below.

All of these appliances work together to make a complete recycling loop in your (or in this case, my) own workspace. At the time of posting, I have not had much experience with this particular field and it is fairly new to me. The shredder and dehydrator work well, but the whole extruding process itself presented some challenges. For one, the filament I was extruding always seemed to come out grey. I have even poured in different types of pellets (fresh, non-recycled) and received pretty similar results. Width also varied considerably. Sometimes, the filament would come out slightly thinner than the required with and occasionally, it would force itself out with such pressure that it thickens to beyond the bore width. 
   I later solved most of these issues with time and tweaking. The filament still comes out grey, but far less than it used to be (this, as I have heard, is actually normal), and after some time to let the extruder push the inconsistencies out of the barrel, it is jamming way less than it used to be, and it is producing more consistent filament widths.
   Throughout my troubles with the extruder, the winding process was quite consistent. Once I string up the filament, the winder can run consistently, keeping perfect time with the extruder and storing the final product neatly onto a spool of my choice. 


This is a new technology for me, and that is precisely why I will be sharing my results and constant discoveries on this blog.

Thursday, January 10, 2019

Hardware

As the title states, Here is where I will give a brief rundown of the tools I use for 3D printing (there will be more in-depth posts later on, but this covers the basics). This post is essentially a list of the things I am currently using to do what I do. It will be updated with a summary each time I make an addition to my collection. 

My original 3D printer: The Replicator Knockoff
Actually, this is a knockoff of a knockoff. The machine is a CTC 3d printer which is derived from the flash forge creator, which is derived from the Makerbot Replicator. Despite this, the differences are small enough that I just refer to it as an original Replicator, and for a time, even updated it to run the stock Replicator firmware (before updating to sailfish later on). This machine is my workhorse. I have replaced both extruders with better 3D printed versions, and added RGB leds to the inside to illuminate the build area. The machine shipped with a large crack on the right front support of the frame but it works fine. To me, this adds some character to it.

My Homemade hodgepodge: The Rep-Rap Luria 
This machine was an experiment from the beginning. I wanted to build a decent printer as simply and as cost effectively as possible. I decided that the use of lead screws would be less of a hassle than the use of belts, so that is what I implemented. I also observed that in general, delta printers were faster, larger, and most importantly, simpler than their standard Cartesian cousins, so naturally, this printer became a delta. Once I had this printer up and running (after about 3 months of hard work), I soon realized why nobody combined lead screws and a delta positioning system before I did. The result was, although precise, slow and loud. I initially had the machine set up on the second floor of my home, and it vibrated so much, you could hear it through the floor in the room below. It was’t a complete success, but it makes reliable prints and is a great conversation piece (in certain occasions, it makes a great stool as well).

Kit made Filastruder:
Nothing unique about it. Includes complete filament factory setup. That is the unique part. This setup consists of the filastruder (obviously), the filament winder (Ian Johnson variety), the shredder of death, and the plastics dehydrator. I have only just finished this setup recently, so I have not had much experience with the whole workflow of plastics extruding/recycling/etc. 

This is the beginning of something Big

When I wrote this title, I was referring to both this blog and the potential of 3D printing itself. Since the start of my investment in this technology roughly 5 years ago(at the time of writing, of course), I have seen numerous advances and changes take place in the market and with the printers themselves. 
Ever since the emergence of the Makerbot Cupcake, one of the first forerunners in this consumer based market, the technology has advanced tremendously. The humble machine had a build area of only 100mm x 100mm x 130mm, was covered in wires, unreliable and finicky, and had mediocre print quality at best, but the machine cost less than 1000 USD, and was the first of its kind. 
   Today, the commonplace machines are made of sleek plastic and metal, and have features and quality that those early machines lacked. 3D printing has come a long way, but it is still an experimental technology, and will still continue to be so until the printers share the same “hit print and forget” reliability of standard household printers. 
   The history lesson aside, I feel like I can contribute to the technology by sharing my experiences with it. Over the years of being in possession of this, I have had many experiences perfect for sharing. Here is where I will post them, and will continue to post as I experience more advancements. Just as well, I will also be sharing my issues and problems with this technology. Part of my philosophy is that by documenting my issues and incompleteness, I can show my personal methodology of troubleshooting as I eventually fix it. A good deal of the solution is in the process.
Don't Forget to check out my other Blog,

MRRF 2019

  Recently, I, along with many others, attended the Midwest Rep-Rap festival, or MRRF. This festival is a meeting of hundreds of make...